> For the complete documentation index, see [llms.txt](https://help.byinspiredlabs.com/llms.txt). Markdown versions of documentation pages are available by appending `.md` to page URLs; this page is available as [Markdown](https://help.byinspiredlabs.com/theme-settings/cart.md).
# Cart
Theme settings - Cart
The **Cart** settings control how your cart looks and works: a cart drawer or a cart page, extra details and notes, cross-sells, a milestone progress bar and a cart reserve timer.
### 1. Cart type
Choose what happens when customers add a product or click the cart icon. Options: Drawer or Page.
{% tabs %}
{% tab title="Drawer" %}
A cart slides in from the side of the screen, so customers can keep shopping. Cross sells and the cart reserve timer are only available in the cart drawer.
{% endtab %}
{% tab title="Page" %}
Customers go to the cart page, which gives a clear path to checkout.
{% endtab %}
{% endtabs %}
{% hint style="info" %}
**Note:** The cart drawer's color scheme, style, position and width are set in [Drawers](https://help.byinspiredlabs.com/theme-settings/drawers.md). The cart page has its own section settings, see [Cart page](https://help.byinspiredlabs.com/cart-page.md).
{% endhint %}
### 2. Cart details
* **Show vendor:** Show the vendor name under each product in the cart. Useful if you sell several brands.
* **Enable cart note:** Add a note field so customers can leave instructions, such as gift wrapping or delivery notes. Shows in the cart drawer and on the cart page.
* **Show dynamic checkout buttons:** Show express checkout buttons, such as PayPal, Apple Pay or Google Pay, so customers can pay faster. These show on the cart page only.
* **Show tax status and shipping policy link:** Show a short note about taxes and shipping, with a link to your shipping policy, in the cart drawer and on the cart page.
### 3. Cross sells
Recommend more products inside the cart drawer. Cross sells only show in the cart drawer, not on the cart page.
* **Enable cross sells:** Turn cross sells on or off.
* **Label:** The heading above the products, for example "You may also like".
* **Product source:** Where the products come from. Options: From collection or From product list.
* **Product list:** Pick the products to show. Used when **Product source** is **From product list**.
* **Collection:** Pick a collection to show products from. Used when **Product source** is **From collection**.
### 4. Milestones
A progress bar that shows customers how close they are to a reward, such as free shipping or a discount. It shows in the cart drawer and on the cart page, and updates as the cart changes.
{% hint style="warning" %}
**Note:** Milestones are display only. The bar doesn't apply any discount or shipping rate. Set up the real free shipping rate or discount in your Shopify admin, using the same amounts. See [Are Milestones and Cart reserve real discounts?](https://help.byinspiredlabs.com/others/faqs/are-milestones-and-cart-reserve-real-discounts.md)
{% endhint %}
* **Show milestone bar:** Turn the milestone bar on or off. The settings below appear once it's on.
* **Content alignment:** Align the milestone message. Options: Left, Center or Right. This also aligns the cart reserve timer.
* **Progress bar color:** The color of the progress bar.
**Milestone 1** and **Milestone 2** each have these settings:
* **Reward:** The type of reward. Options: Free shipping or Discount (display only).
* **Reward label:** A short label, for example "Free shipping" or "Save 10%". When you use two milestones, each one shows as a point on the bar, and the label appears when customers hover over it.
* **Amount to reach:** The cart total needed for this reward. Enter numbers only, without currency symbols or letters (for example, `250`).
* **Message before reached:** The message shown until the amount is reached. Use `||amount||` where the remaining amount should appear, for example "You are ||amount|| away from free shipping."
* **Message when reached:** The message shown once the amount is reached.
To show only one milestone, leave **Amount to reach** in Milestone 2 empty. If you use both, make Milestone 2's amount higher than Milestone 1's. When both are reached, Milestone 2's **Message when reached** is shown.
{% hint style="info" %}
**Note:** Enter amounts in your store's default currency. When a customer shops in another currency, the bar converts the amount using Shopify's current exchange rate, so the converted amount may not be a round number.
{% endhint %}
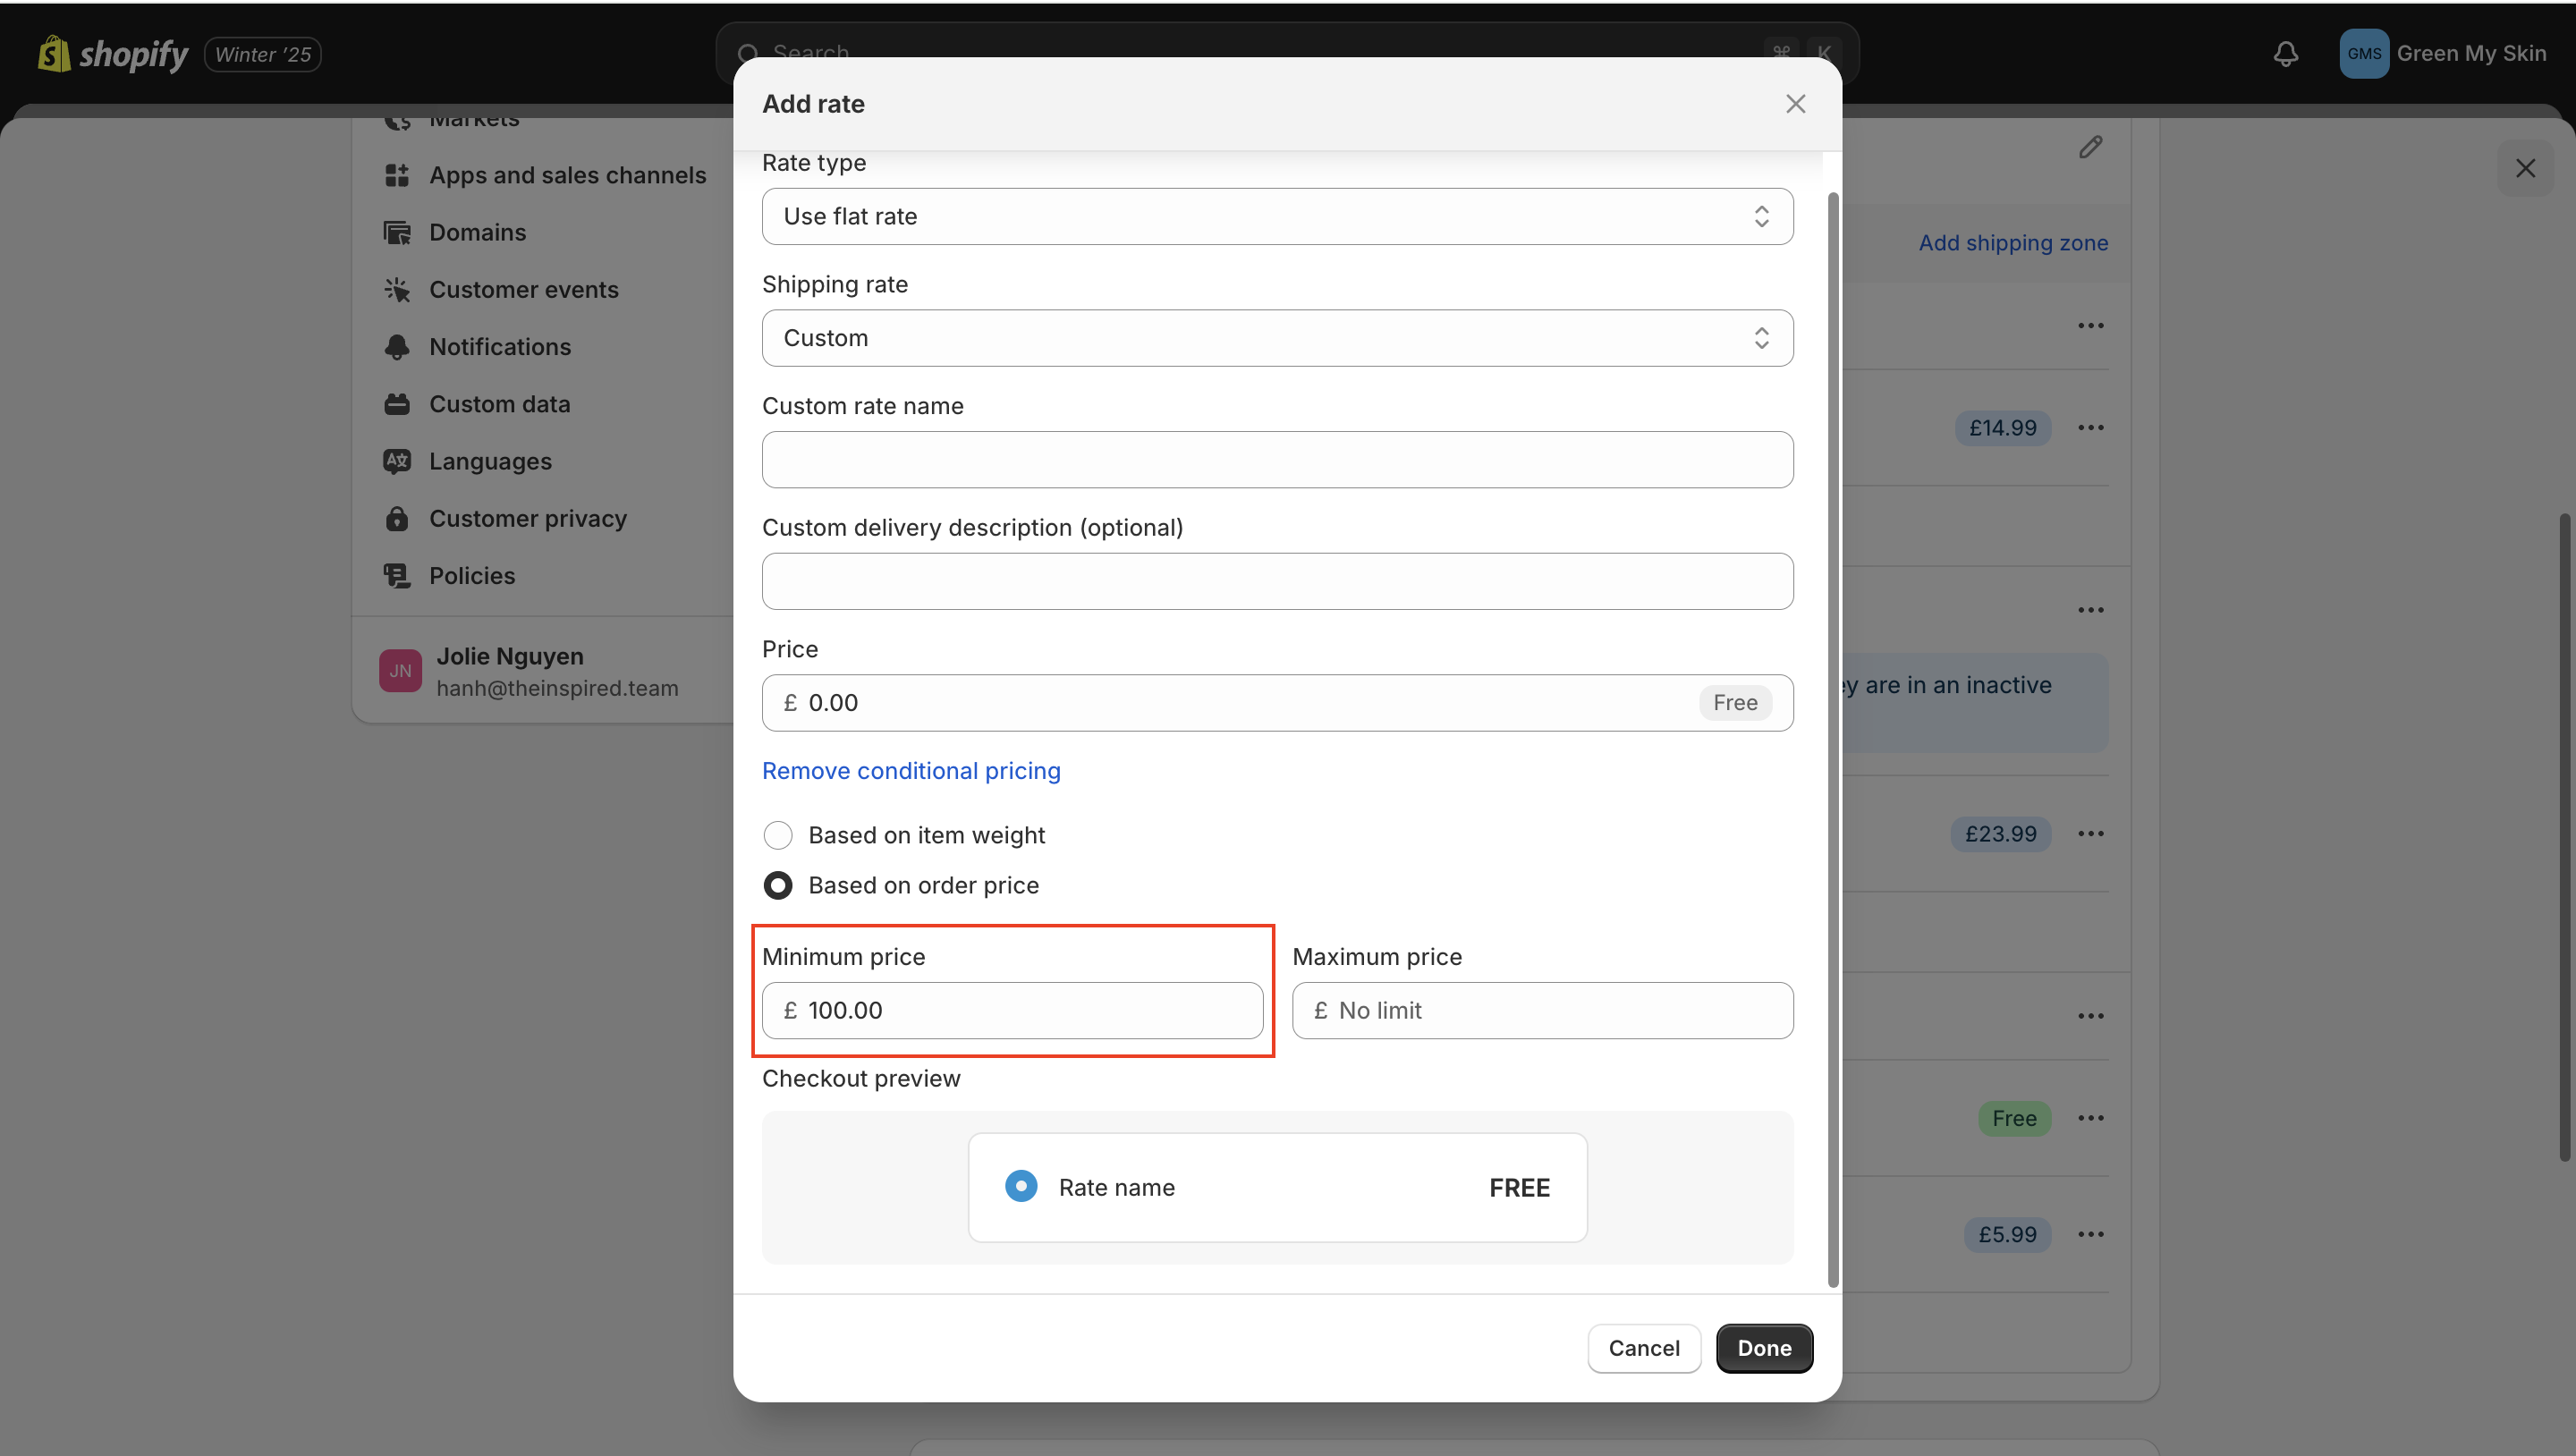
How to set up a free shipping rate in Shopify
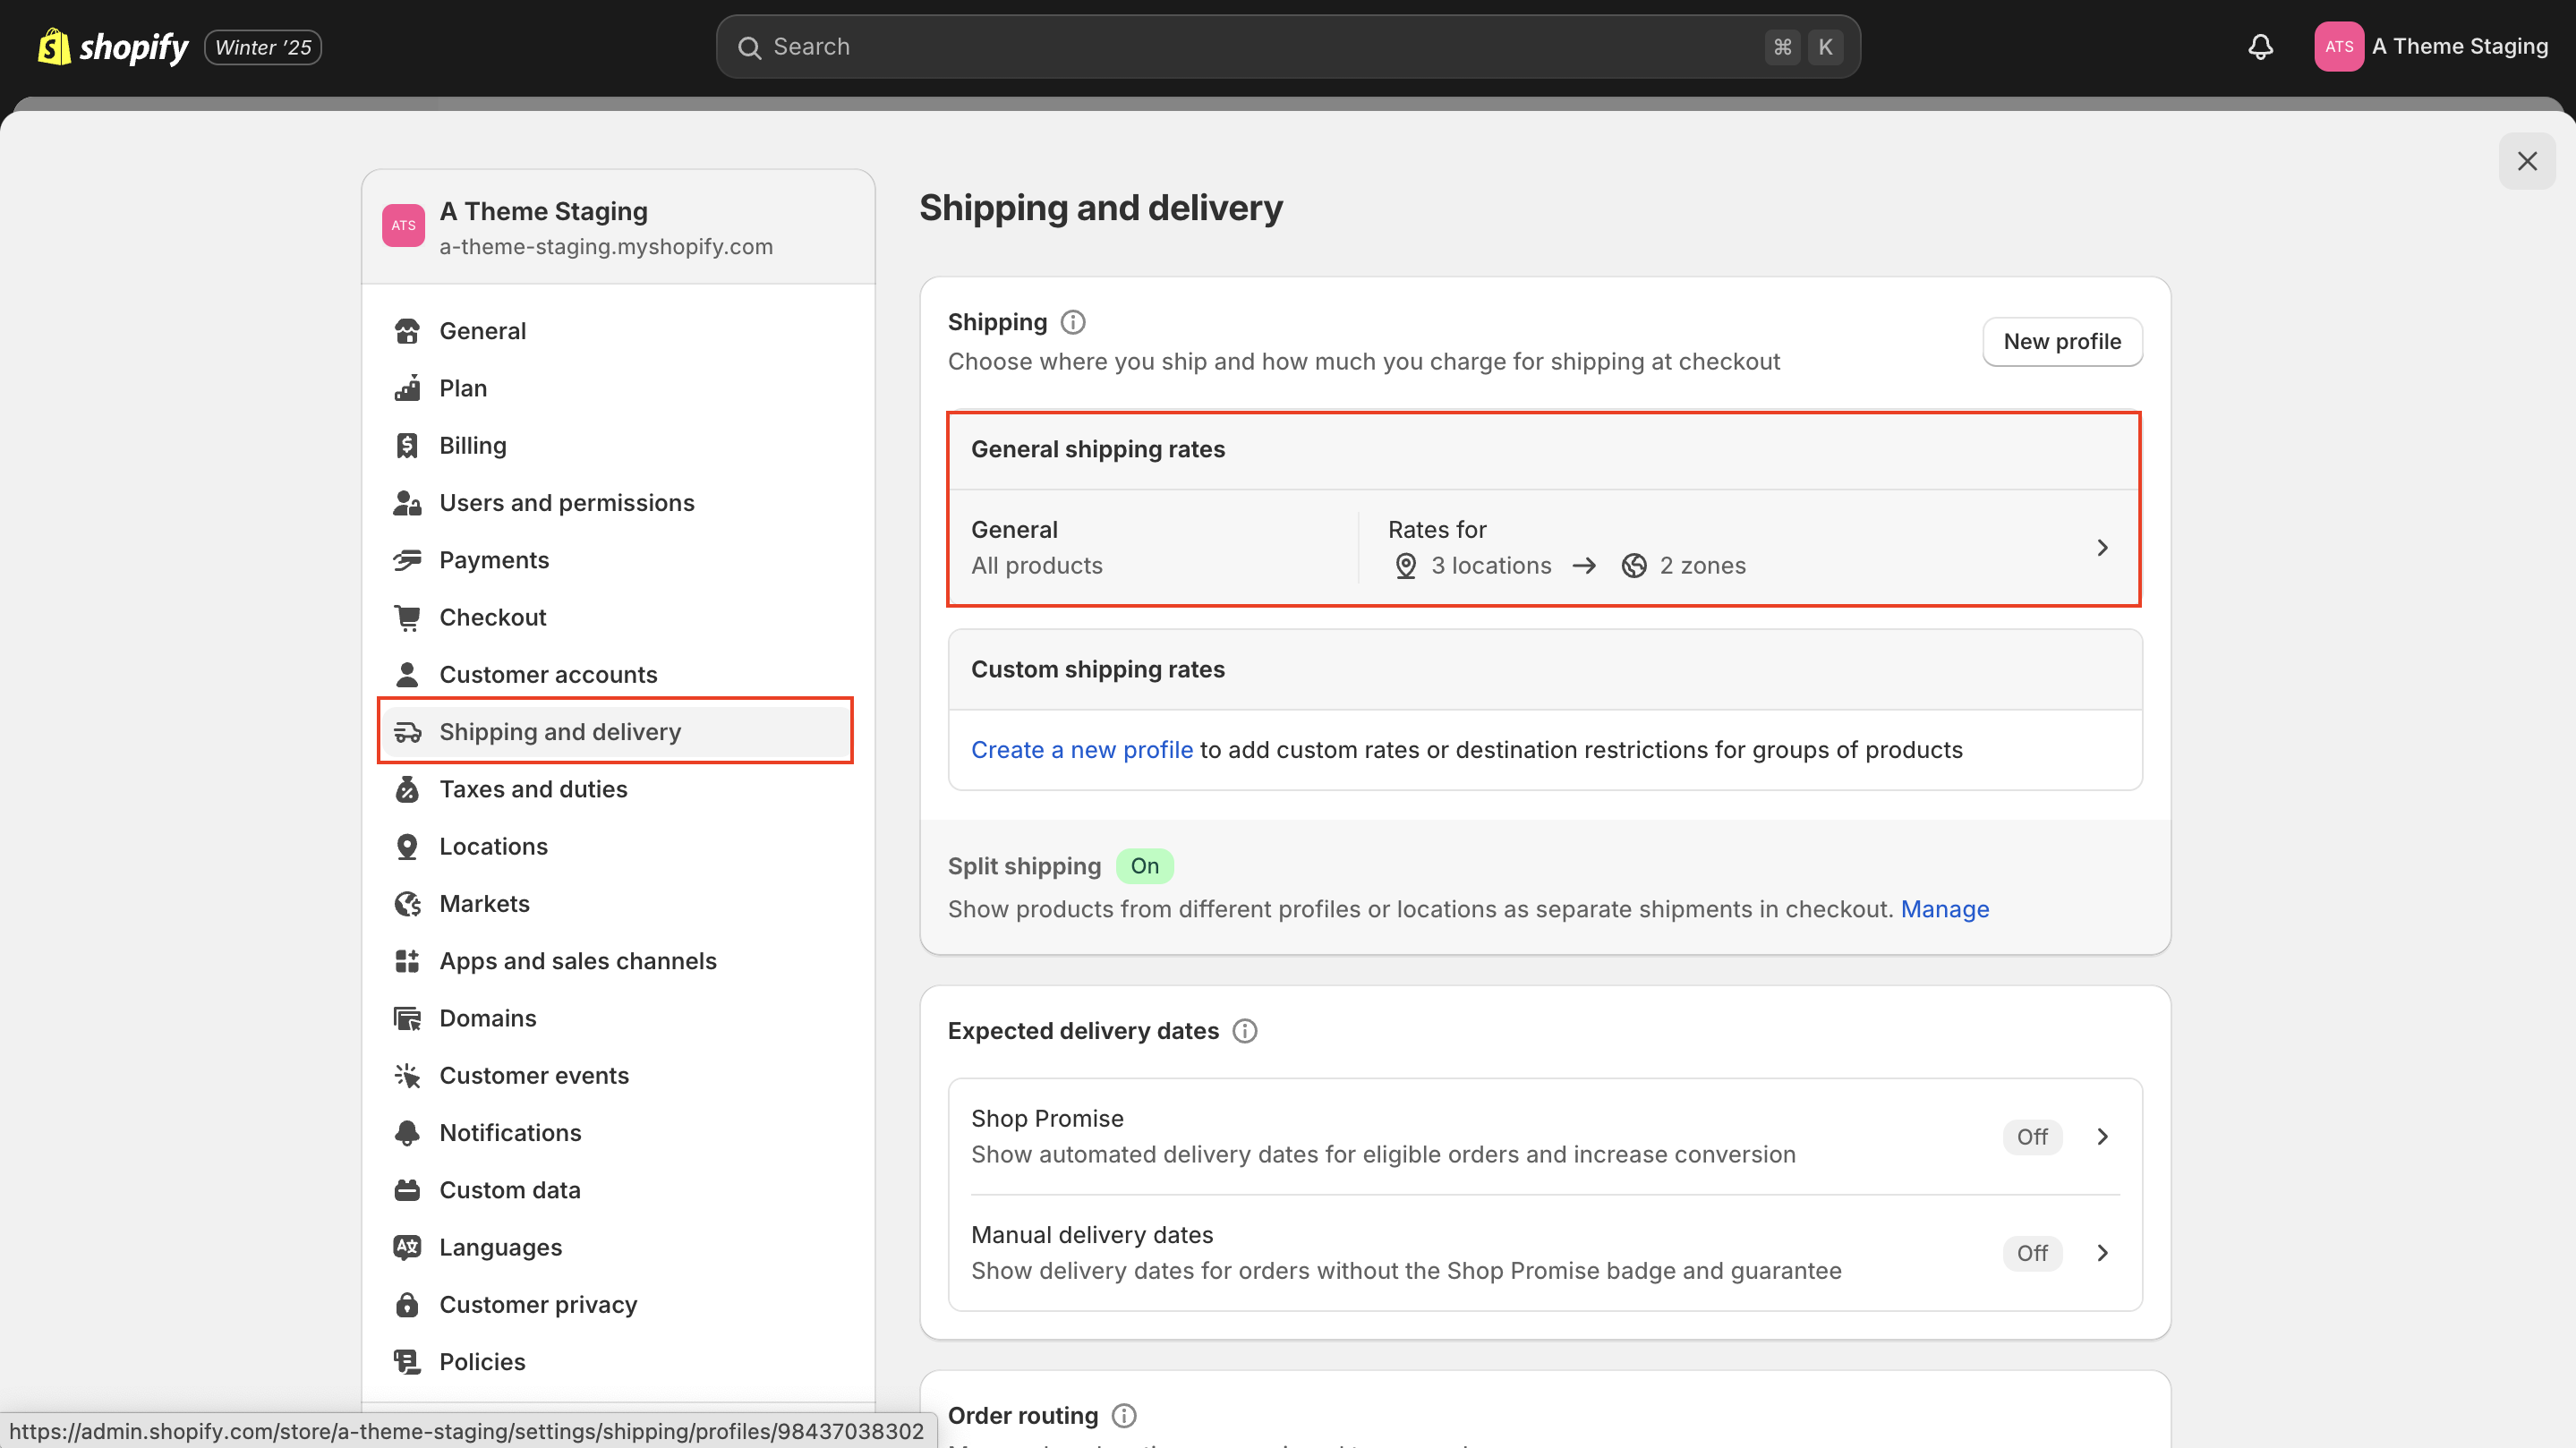
* **Step 1:** In your Shopify admin, go to **Settings > Shipping and delivery** and find **General shipping rates**.
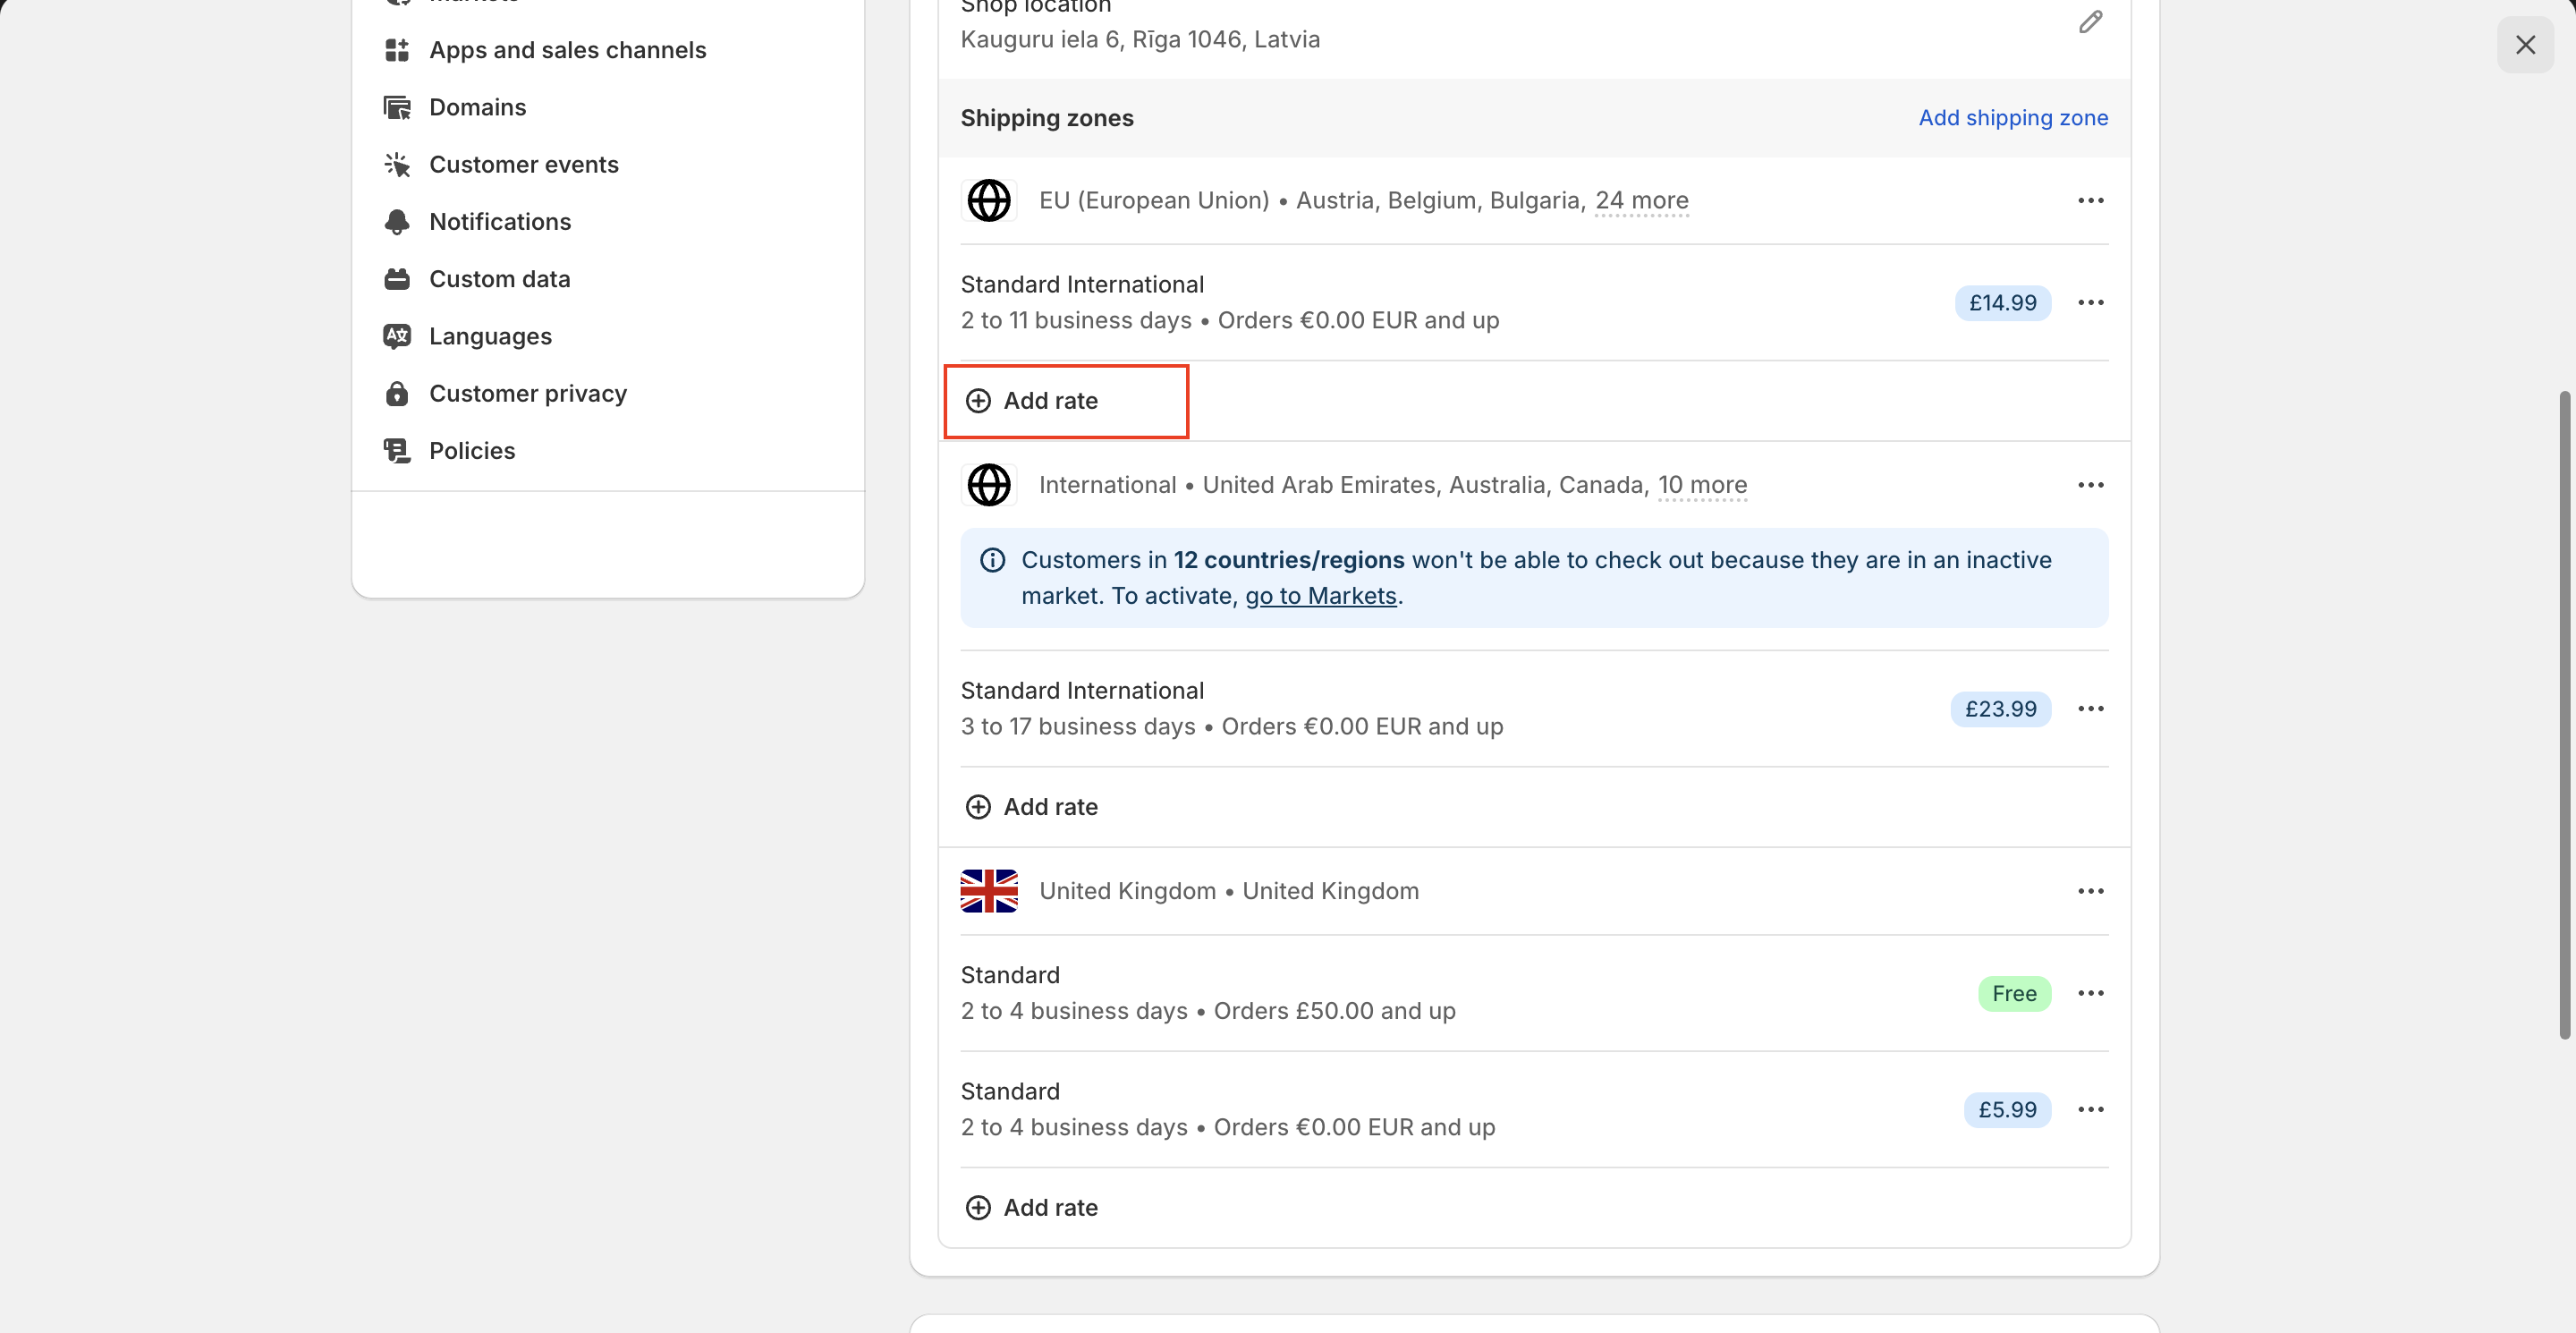
* **Step 2:** Under **Shipping zones**, find the zone where you want free shipping, then click **Add rate**.
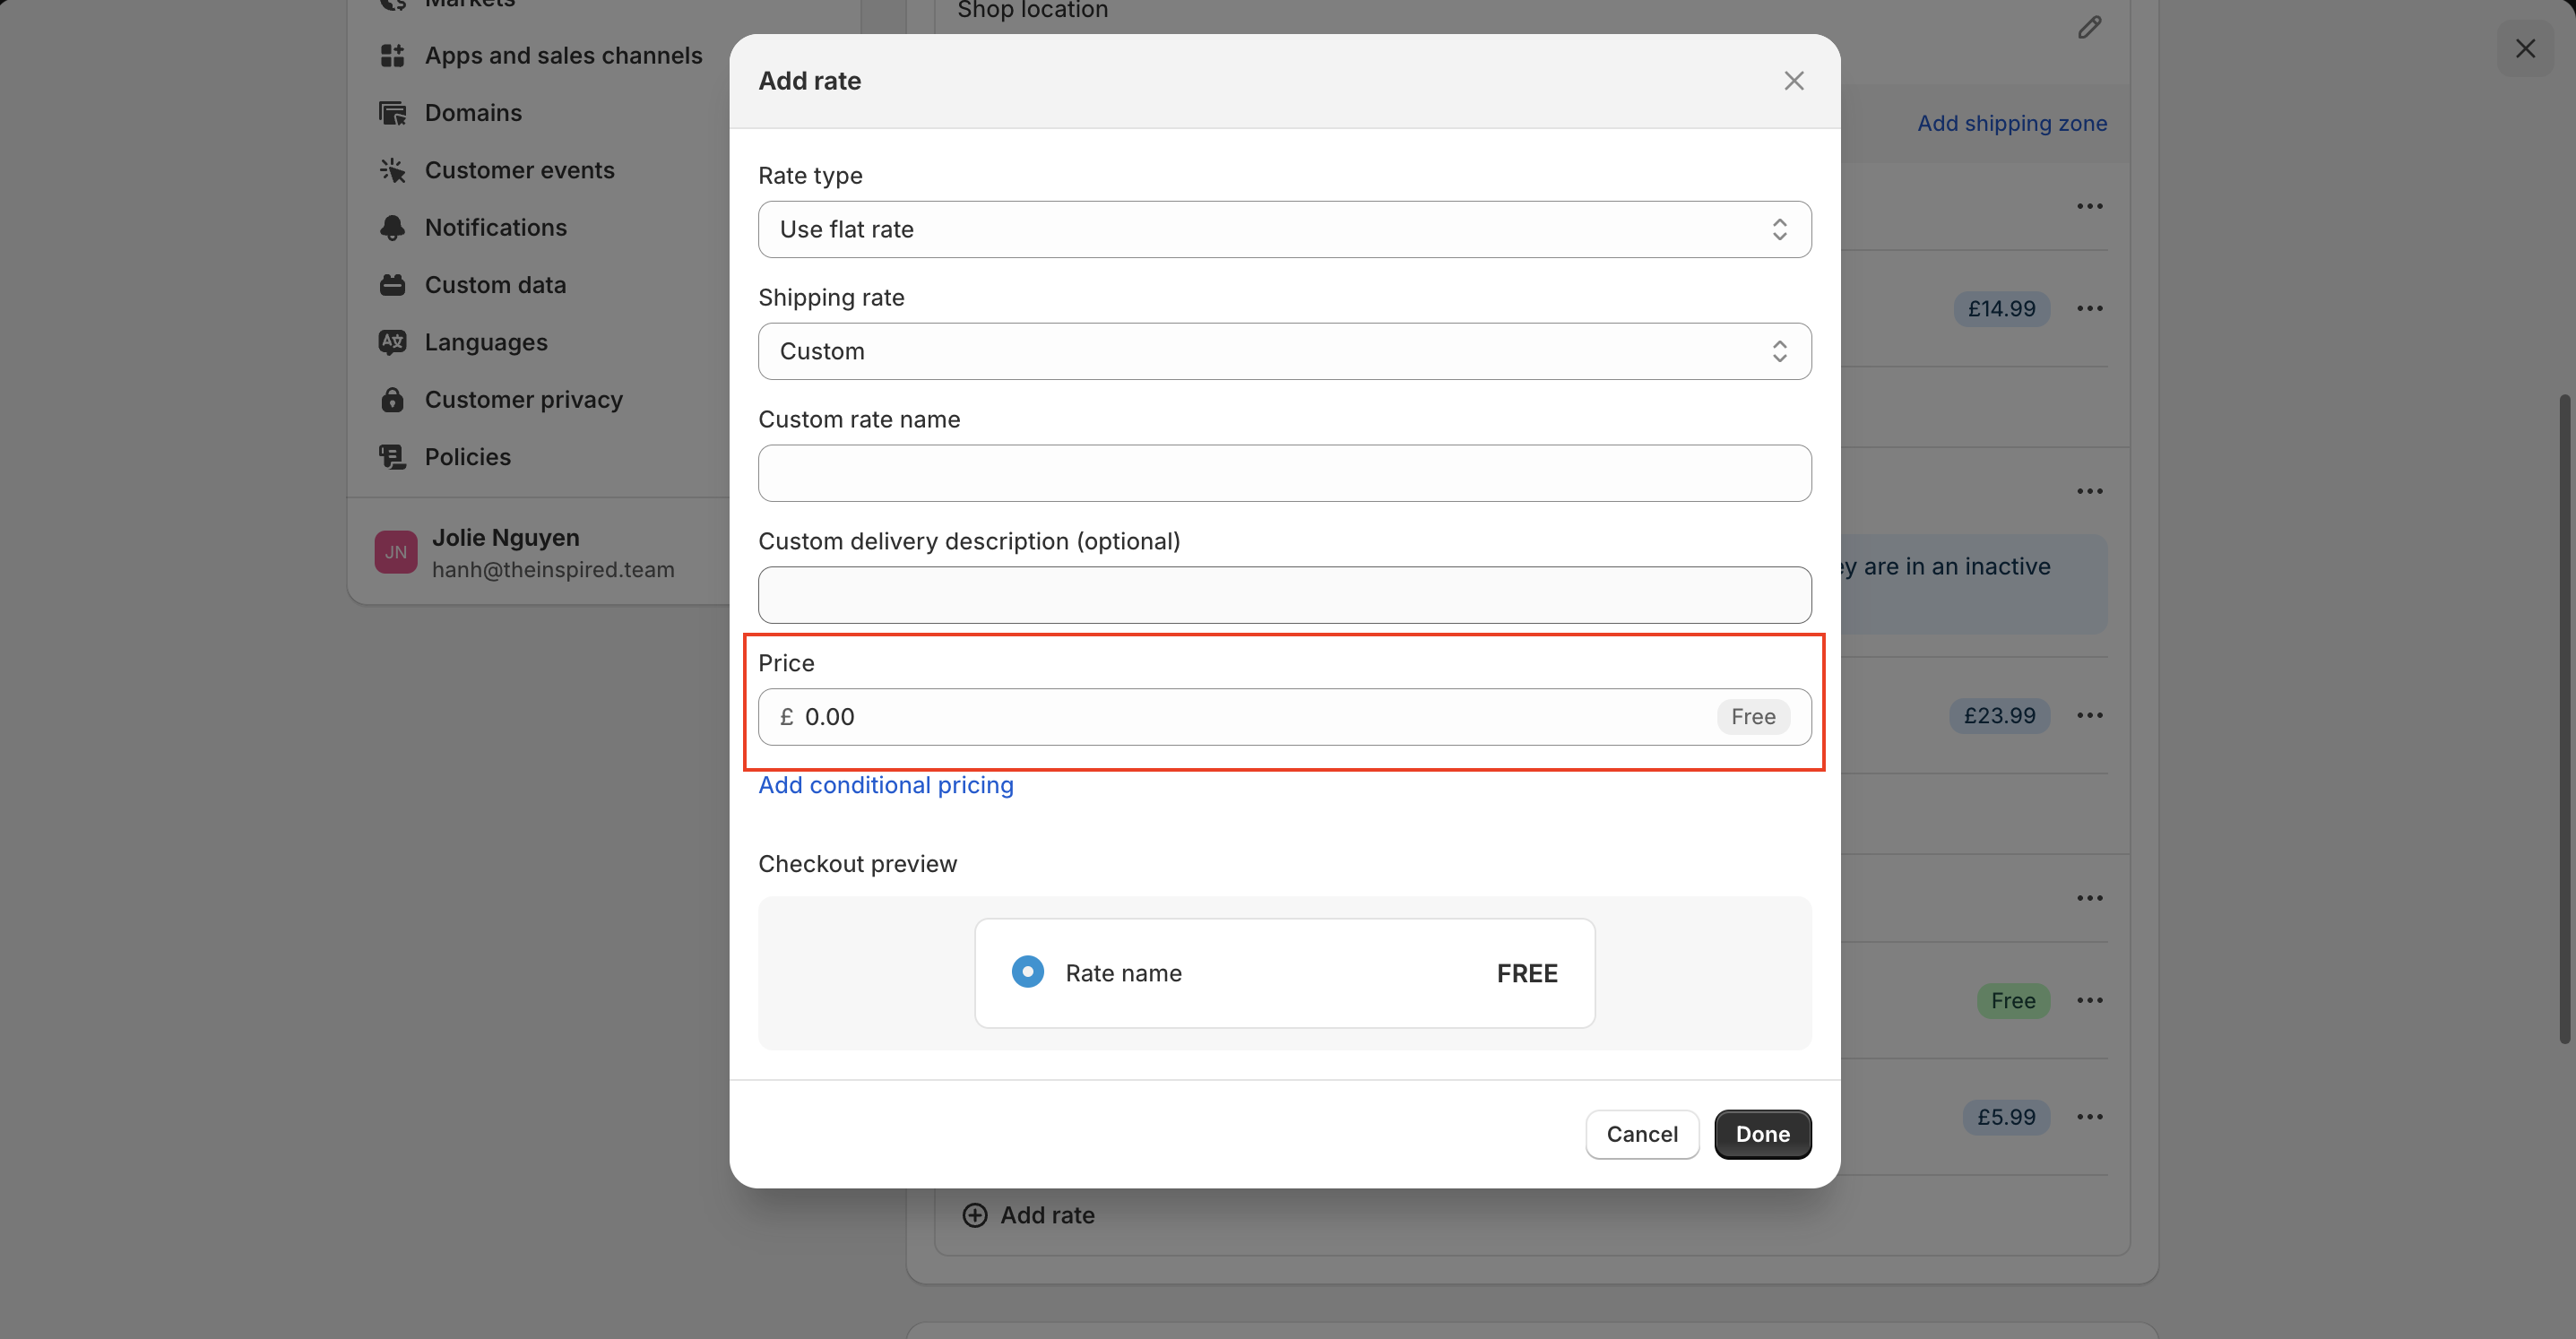
* **Step 3:** Leave the **Price** as **0.00**.
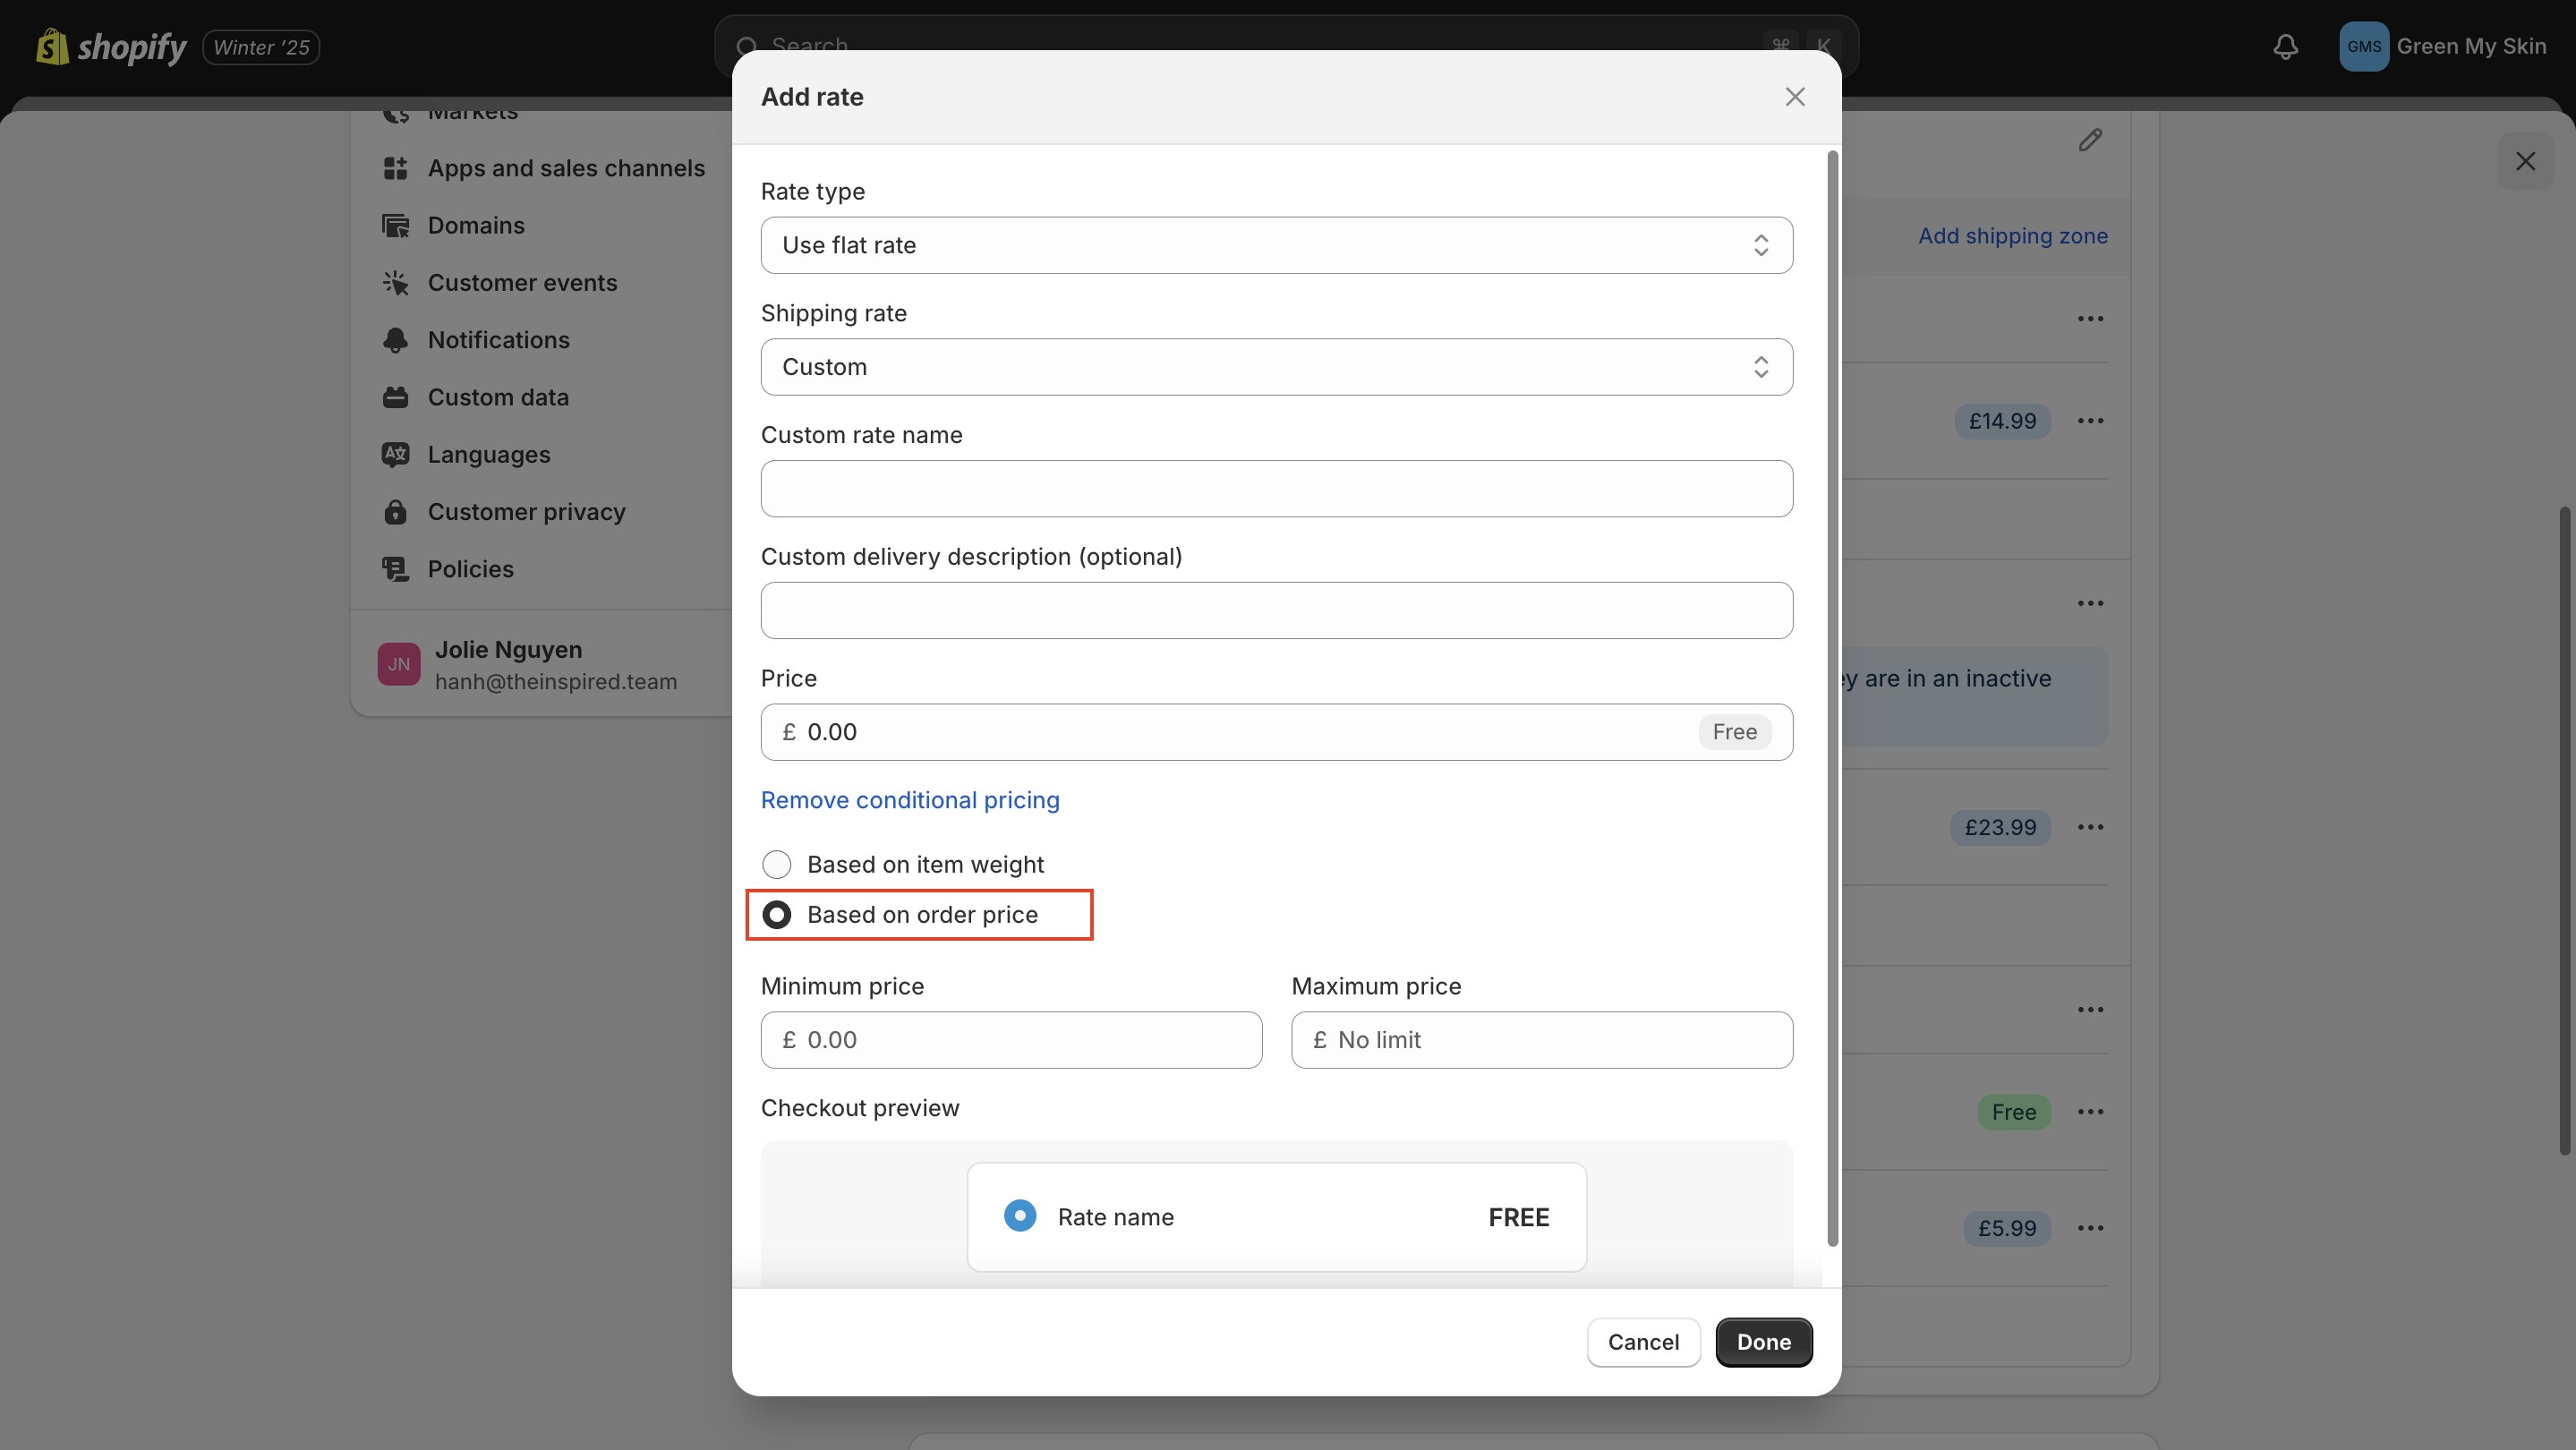
* **Step 4:** Click **Add conditional pricing** and select **Based on order price**.
* **Step 5:** Enter the minimum order price. Use the same amount as your milestone's **Amount to reach**.
* **Step 6:** Click **Done**, then **Save**.
### 5. Cart reserve
A countdown in the cart drawer that encourages customers to check out, for example "Your items are reserved for 09:45". It only shows in the cart drawer, so **Cart type** must be **Drawer**.
* **Enable cart reserve timer:** Turn the timer on or off. The settings below appear once it's on.
* **Reserve duration:** How long the countdown lasts, from 1 to 60 minutes.
* **Timer label:** The text of the timer. Use `|time|` where the countdown should appear, for example "Your items are reserved for |time|". If you leave out `|time|`, the countdown is added at the end.
* **Color scheme:** The colors of the timer bar. Options: Default, Accent 1, Accent 2, Accent 3, Background 1, Background 2 or Background 3. **Default** uses the **Light background** color from [Colors](https://help.byinspiredlabs.com/theme-settings/colors.md).
**How the timer works:**
* The countdown starts when the cart has items, and starts again from the full duration whenever the cart changes.
* When the countdown reaches zero, the cart is emptied.
{% hint style="warning" %}
**Note:** Cart reserve is display only. No stock is actually held for the customer, and other shoppers can still buy the same items.
{% endhint %}